
Installing Gotoh AG Aged Gold Minis on a Taylor GS Mini

Our next project for the SGS510Z-S5-AG mini sized Aged Gold machine heads is installing them on a Taylor GS Mini. These little guitars are popular and from what we can tell it's for a reason! Taylor has packed a surprising amount of quality sound and playability into an inexpensive little package. However, we still felt a nice set of Gotohs could only make it better.
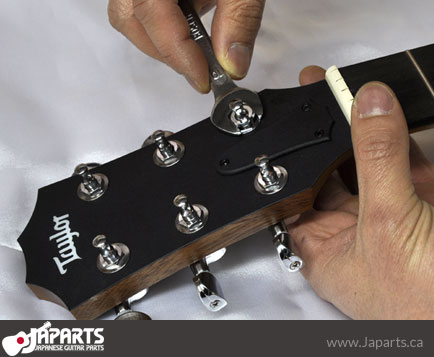
(And just because we could, we replaced the stock bridge pins with some nice ebony pins1. If you're like us and you rest your hand on the bridge the ebony feels much nicer.)
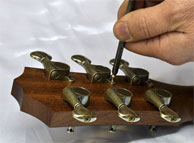
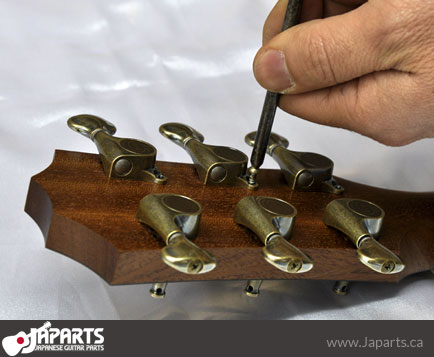
For the machine heads, step one is to take out the old ones2. It's very easy - all you need is a #10 spanner.
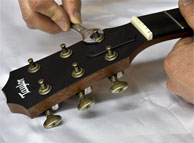
These ones look like they're using a couple of pins to keep the machine head from spinning3. Unlike the Larrivée parlor, which had screws in a different position, these won't require any holes to be filled. The pin-holes end up underneath the machine head bodies and out of sight.
-
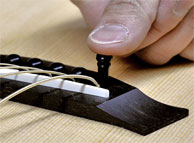
1 Installing bridge pins.
-
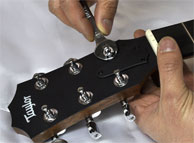
2 Removing the original machine heads.
-
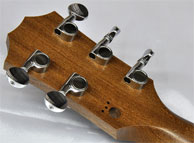
3 Checking pin holes.
-
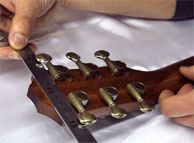
4 Alignment.


That makes installing the Gotohs pretty easy. Put them all in and tighten the bushings just enough so that the machine heads don't slide around but can still be moved by hand. Then use a straight edge as a reference to line them up nicely4.
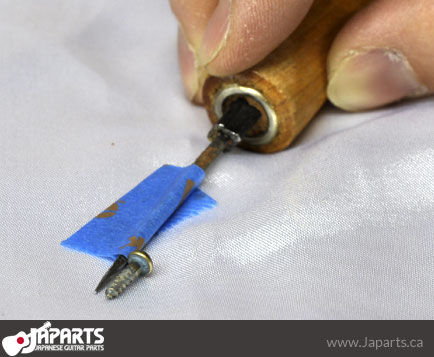
Time to break out your handy Japanese kiri. Don't have one? That's okay - you can just use a drill. We highly recommend pre-drilling holes for the screws. Make sure you don't drill too deep5 or (heaven forbid) too wide. If you're using a power drill you may want to mark the spot for the hole and then move the machine head's screw-mount out of the way while you drill. Pre-drill each hole carefully6.
-
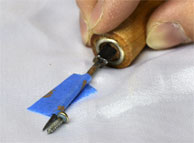
5 Pre-drill prep.
-
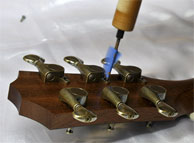
6 Pre-drill screw-holes.
-
7 Screwing screws.
-
8 Tighten bushings.
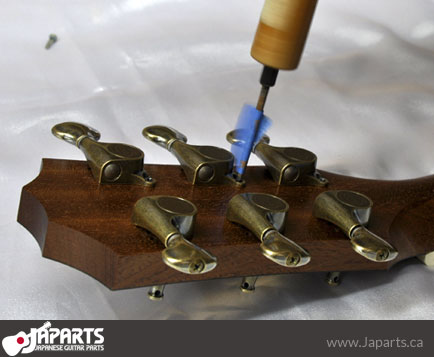

Once the holes are pre-drilled, screw in the wood screws7 firmly but not too tight. These serve the same purpose as the pins - they stop the machine heads from spinning. It's the bushings that hold everything in place and tightening them8 is the last step. Make sure they're firmly in place but don't tighten them so much that they dig into the headstock. Remember that too much tightening can cause damage.
That's it! String it up and enjoy both the precision and beauty of your new Gotoh machine heads! The last thing to show you here is before and after photos...
-
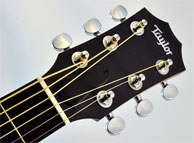
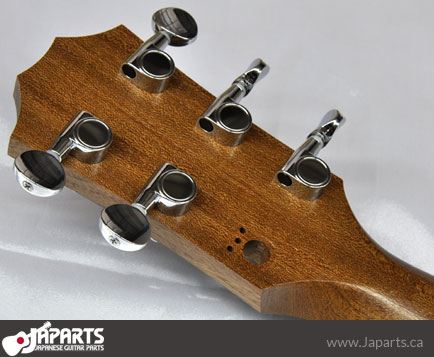
Before: stock machine heads.
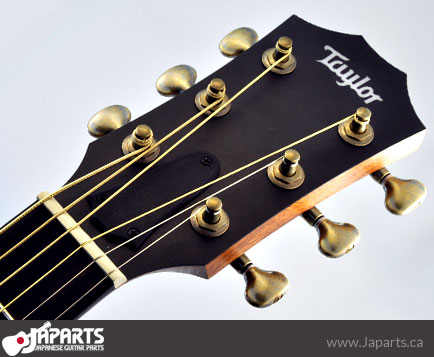
-
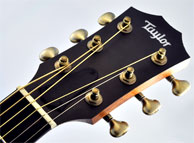
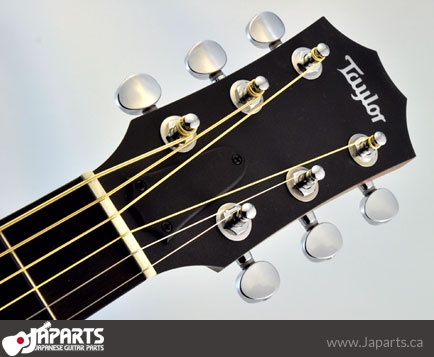
After: GOTOH SGS510Z-S5-AG
One last thing: purely by coincidence the gig bag that our GS-Mini shipped in is a near-perfect match with the AG finish!